Finalizing Your Course: Eight Things to Double-Check
Once you’ve built out your course (whether migrated or from scratch), you’ll want to double-check a few items to finalize your course!
- Edit Course Navigation Menu
- Link Course Content Items to Modules
- Customize Your Course Home Page
- Set Up Your Gradebook and Grading Policies
- Check for Broken Links Using the Link Validator
- Publish Modules and Module Items
- Check Student View
- Publish the Course
- Canvas Getting Started Guide
- Canvas Instructional Support
Edit Course Navigation Menu
You’ll want to double-check which tools are enabled/disabled (or visible/hidden from students). Go to Settings > Navigation to enable the tools you’d like students to see in their Course Navigation Menu. Here you can also change the order that tools appear in.
 Canvas recommends leaving Home, Syllabus, Announcements, Modules, and Grades enabled. And in general, Canvas recommends leaving Assignments, Discussions, Quizzes, Pages, and Files disabled so students access all course content items through Modules.
Link course content items to Modules
Since the Assignments, Discussions, Quizzes, Pages, and Files tools are hidden from students by default, students will need to access all course content items through Modules. Make sure that you’ve added all course content items to the Modules you want them to appear in. You can do this by going to Modules and clicking on the plus symbol next to the appropriate Module.
Customize your course Home Page
By default, a template will be applied to your course Home Page. If you’d like to use this template, you can edit the red text and fill in information related to you and your course. Go to Home > Edit to begin editing the template Home Page.
If you’d like to create your own Home Page or set your Home Page to an already existing page, you can do that in Pages. You can set any page as the “Front Page” in your course.
You can also choose a different layout for your course Home Page. Canvas allows you to set the Home Page as an activity stream, as Modules, as an Assignments list, or as your Syllabus. You can change your Home Page layout by going to Home > Choose Home Page.
Set up your Gradebook and grading policies
The Gradebook has quite a few features that need to be enabled/disabled prior to grading student work. To begin, make sure all of your graded assignments, discussions, and quizzes appear as columns in the Gradebook. If they do not appear in the Gradebook, go back into Assignment settings and edit grading details. Assignments set to “Not Graded” do not appear in the Gradebook.
You can also choose to weight your Gradebook based on assignment groups. double-check if your assignment groups are weighted or not and if they are weighted correctly. You can access weighting by going to Assignments > clicking on the three dots in the right corner > Assignment Groups Weight.
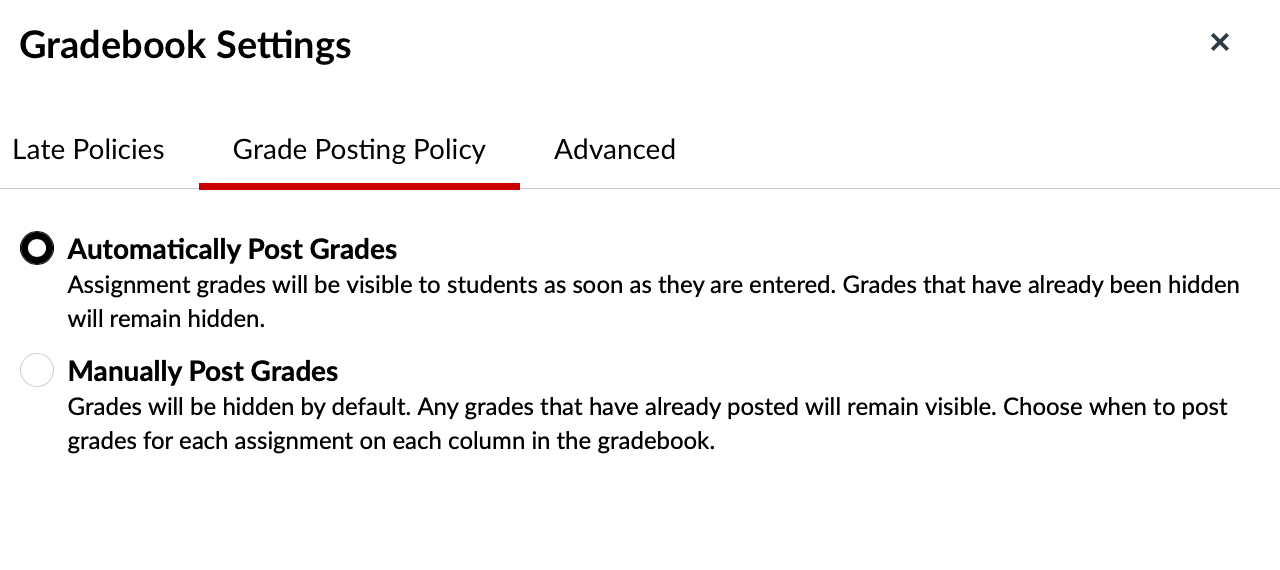
Next, check your grade posting policies. You can use posting policies in the Gradebook to manage assignment grade visibility for students. Posting policies can be set for an entire course and individual assignments. By default, grades are automatically posted and visible to students unless you switch to a manual grade posting policy. You can change your grade posting policies for the entire course by going to Grades > click on the gear in the right corner > Grade Posting Policy. You can also change grade posting policies for individual assignments by clicking on the three dots next to the assignment > Grade Posting Policy.
Finally, you can set up missing submission policies and late submission policies in the Gradebook. These policies allow you to automatically apply a grade for all missing submissions or automatically deduct points on all late submissions. You can set up missing and late submission policies by going to Grades > click on the gear in the right corner > Late Policies.
 Check for broken links using the Link Validator
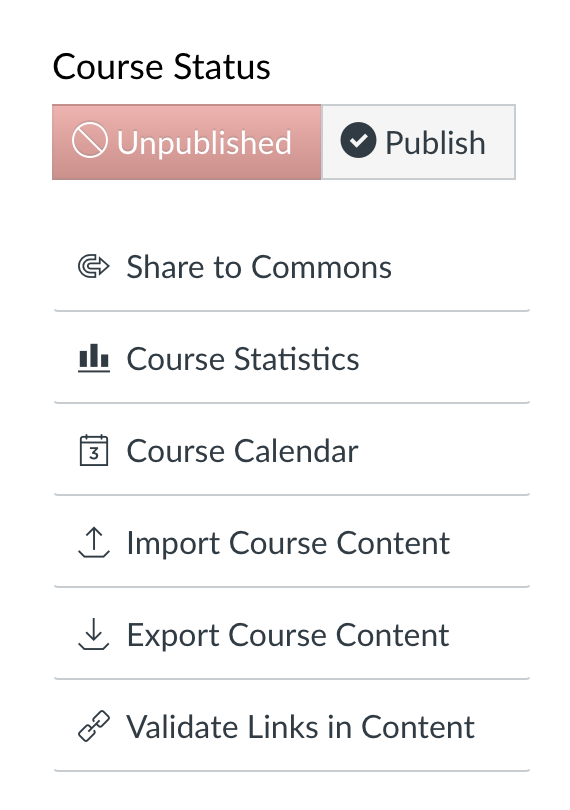
Canvas has a cool accessibility feature called the Link Validator. This tool allows you to verify that links in your course are valid. The Link Validator searches through course content and identifies invalid links in both published and unpublished content. You can access the Link Validator by going to Settings > Validate Links in Content > Start Link Validation. Take this quick step to make sure links in your course are accessible!
Publish Modules and Module Items
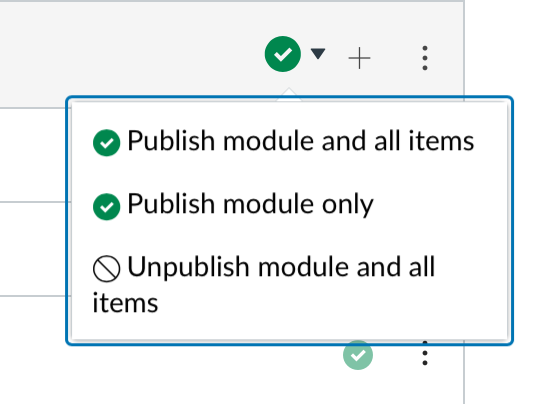
 Once all your settings and content are in place, make sure that Modules and Module Items you want students to access are published. If a Module or item is left unpublished, students won’t be able to see it. Be aware that an unpublished Module overrides a published item. This means that an item can only be visible to students if the larger Module the item is under is published. You can publish Modules and items by going to Modules and clicking on the circle-backslash symbol next to the Module or item you want to publish.
Check Student View
Before you publish your course, use the Student View to test the visibility of your course materials. In Student View, you can practice submitting assignments, taking quizzes, contributing to discussions, viewing grades, accessing links, and so on. While in Student View, be sure all resources you want students to access have been published. If an item appears in gray, it is not accessible to students and needs to be published.

Publish the course
When you are ready for students to access the course, be sure to publish the course! You can publish your course by going to Home > Course Status > Publish. You can also publish the course directly from your Dashboard by clicking on Publish in the left corner of your course card.
It is also best practice to send out a welcome announcement inviting your students to the course. Keep in mind any announcements you post will not be sent out until the course is published.
These guides are inspired by the guide from https://www.csusm.edu/iits/services/ats/idesign/canvas/gettingstartedquickguide/index.html
These guides are inspired by the guide from https://www.csusm.edu/iits/services/ats/idesign/canvas/gettingstartedquickguide/index.html

