Record and Edit Video in Canvas Studio
-
Recording a quick webcam or audio recording from the rich text editor
 From the Rich Text Editor (RTE), click the Record/Upload Media button and choose Upload/Record Media.
 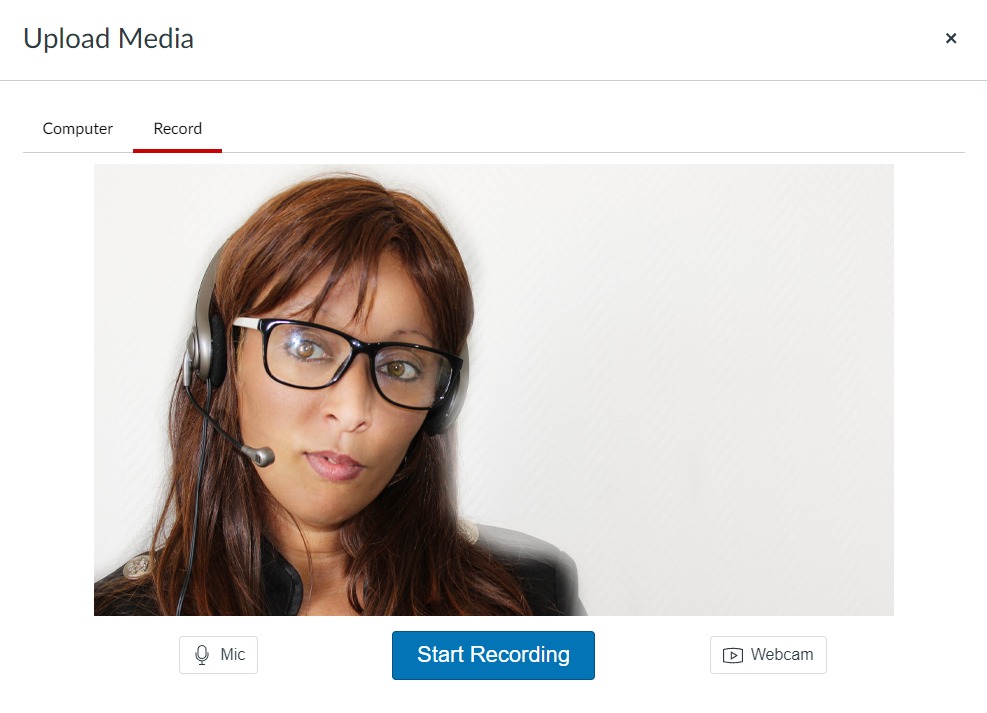 Click on the Record tab in the window that opens.
The Upload Media recorder allows you to record either Webcam with Audio by simply clicking the Start Recording button. To record Audio only, disable the webcam by clicking on the Webcam button and choosing “No Video” .
When done, clicking Finish will give you the option to name your video and clicking Save Media will insert that video into your Canvas course.
Clicking the Start Over button as you’re recording or after you click Finish will delete the current video and allow you to try your recording again.
Note: Video recorded outside of Studio using the Rich Text Editor (RTE) are saved as part of that course’s data allotment and stored in the Uploaded Media folder in Files. Video recorded in the RTE are not saved in your Studio library.
-
- Recording a quick webcam or audio recording from the rich text editor
- Install Studio Screen Capture App
- Recording Screen Capture (+webcam)
- Adding Annotations
- Replacing Thumbnail
- Sharing Videos in Canvas
- How to Add Video Directly to a Module
- Adding Closed Captions
- Sharing Videos
- Return to Canvas Studio
Install Studio Screen Capture App
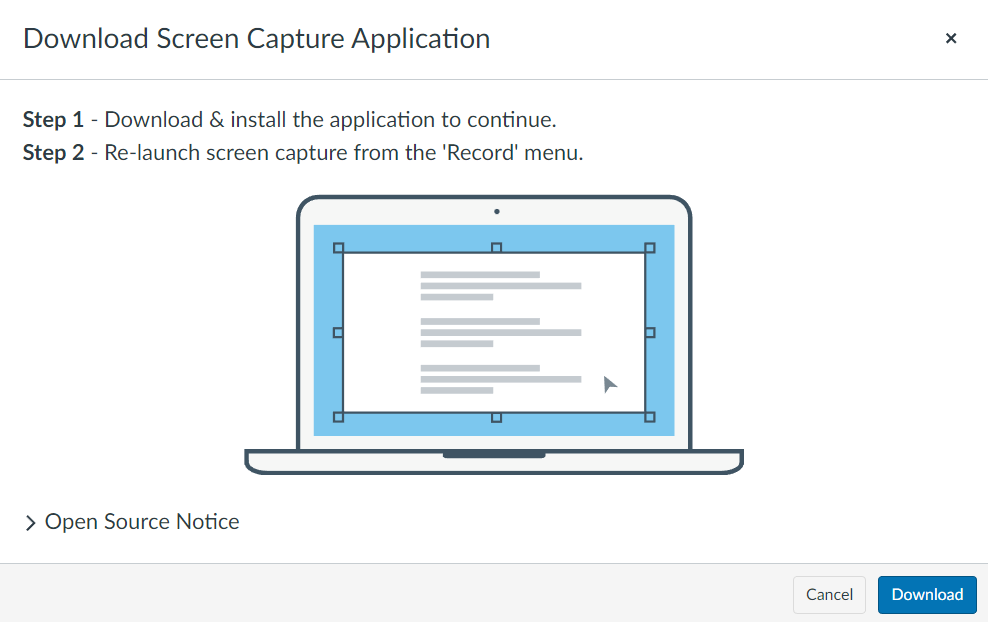
 From your Studio Library, click on the Record button in the upper-right and choose Screen Capture.
The first time you do this, you will have to install the screen capture app. This is a one-time install on any browser and computer on which you use the Canvas Studio recorder
Recording Screen Capture (+webcam)
- Set window capture size (try not to go below 720p)
- Make sure microphone is using the correct source and at a good volume

- Computer Audio (on/off) will determine if sounds the computer makes such as from a sound file or alert sound will be recorded or not.
- Press Record. After a short countdown, the app will begin recording anything in the recording area as well as any sound going into your microphone.
- When done recording, press the Pause button.

- Click the Trash Can icon to delete the recording and start over or the Done button if happy with the result.

-
 The editor will open, and you’ll be able to save your video into your library. Add a title (this will also be the name of your file) and a description (optional), then click Upload. After the rendering process is done, clicking Continue will bring you back to the Studio library where your new video will appear.
 - If you click on the Edit button, you will enter the editor and be able to perform cuts (among other functions) to your video. At the bottom of the editor, move your playhead close to where you’d like to remove a section of your video by either clicking the Play button or clicking in the timeline to jump to the correct position. Click the +Cut button (if you see something other than +Cut, you can choose Cut from the top of the Tool menu).

- Clicking and holding on the red line that appears at your playhead, move the line backwards and/or forwards to “bracket” the part of the video you don’t want.

The triangular Play button in the middle of the tool will allow you to preview your edit, and the Done button will apply the cut. Make sure to play through the edit to double-check that it’s correct. If you’re not happy with the edit and would like to try again, click the Undo button in the top-right.
- When you are done making your edits, click the Done button and refer to step 7.
Adding Annotations
-
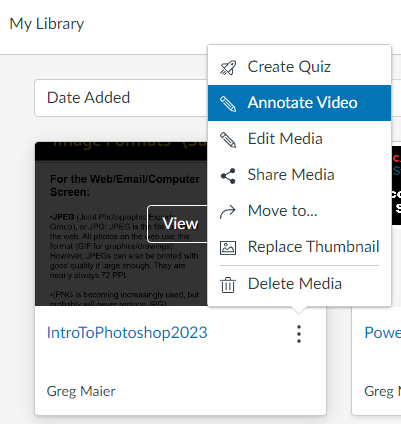
 Click on the three dots on the video you’d like to annotate from inside the Studio library and click Annotate Video.
 - When the video opens in the Annotate tool, move the playhead to the part of the video where’d you’d like an annotation and click the Plus icon above your position in timeline.
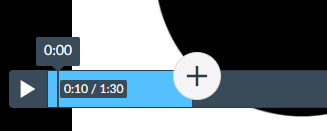
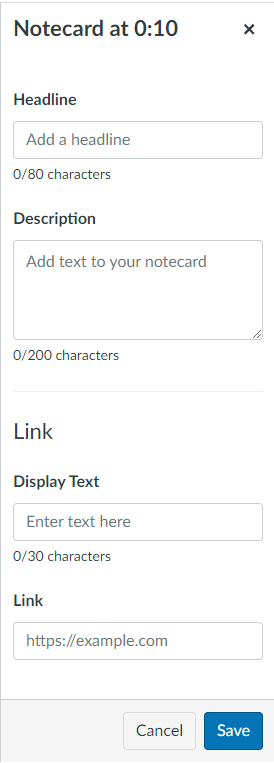
- Fill out the Notecard fields that appear on the right-hand side and click Save in the bottom-right corner. (Any links added to an annotation will appear in a new tab in the browser.)
[Annotation_Fill_Save] - Click the Done button when you’re done adding your annotations.
- Back in the library, click on your video to see the main video page. Annotations appear on the timeline as white circles at the top. When the video playback reaches an annotation, the video will stop, display the annotation, then resume once Continue is clicked.
Replacing Thumbnail
 In the Studio library, you can add a custom thumbnail by clicking on the three dots on a video and choosing Replace Thumbnail. In the open dialogue box, find the .jpg or .png of the image you’d like the video to display when embedded, select it, then click Open. The picture will now display as that video’s thumbnail.
Sharing Videos in Canvas
Sharing your videos with students can be done by inserting them directly from your Studio Library. To share directly, you have to be in the Rich Text Editor.
Note: For accessibility reasons, always use the embed code from YouTube, Vimeo, or any other external video source and not from your Studio library.
- Click on the Canvas Studio icon.
- Find your video in the column of videos that appears.
- Hover your mouse over it.
- Click Select.
This list defaults to the most recently uploaded videos at the top, but can also be searched by file name. This is one reason why being mindful of the names of your files can be important. Your video will be embedded at your cursor.
Embedding a video using embed code from Canvas Studio is typically unnecessary, but to do so:
To embed a video:
- Go to your Studio Library.
- Click the three vertical dots next to the desired video’s title.
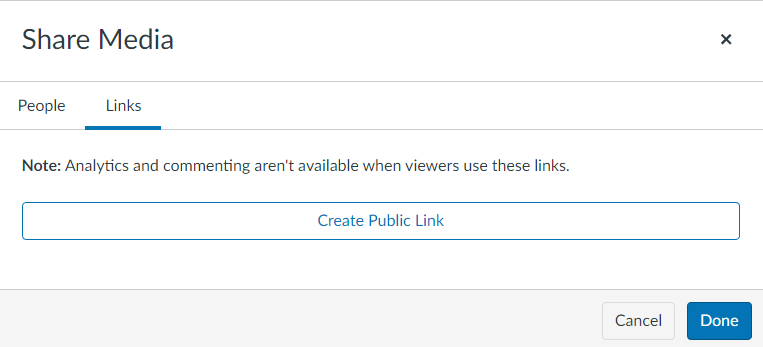
- Select Share Media.
- Click on the Links tab.
- Select Create Public Link.
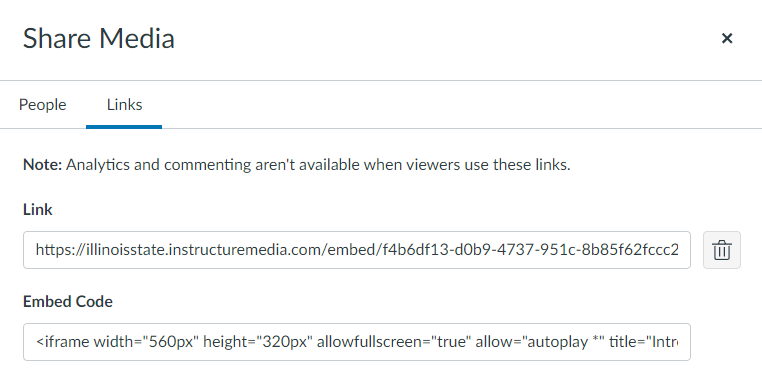
- Click on your embed code.
- Click Done.
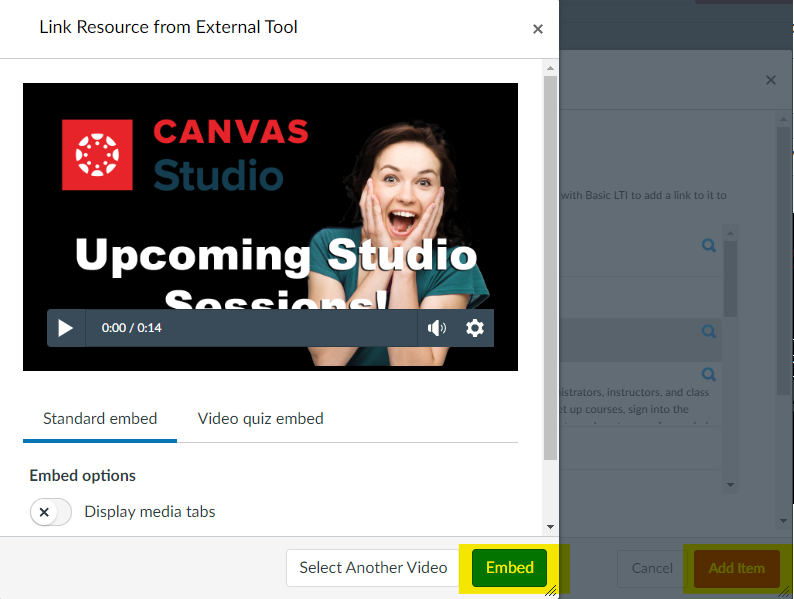
 To add embed code in the RTE of Canvas, click the three vertical dots on the end of the toolbar (yellow highlight] and then click on the Embed cloud button (green highlight)
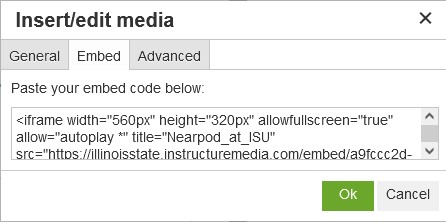
- Click the Insert/edit Media button.
- Click on the Embed tab.
- Paste your embed code there.
How to Add Video Directly to a Module
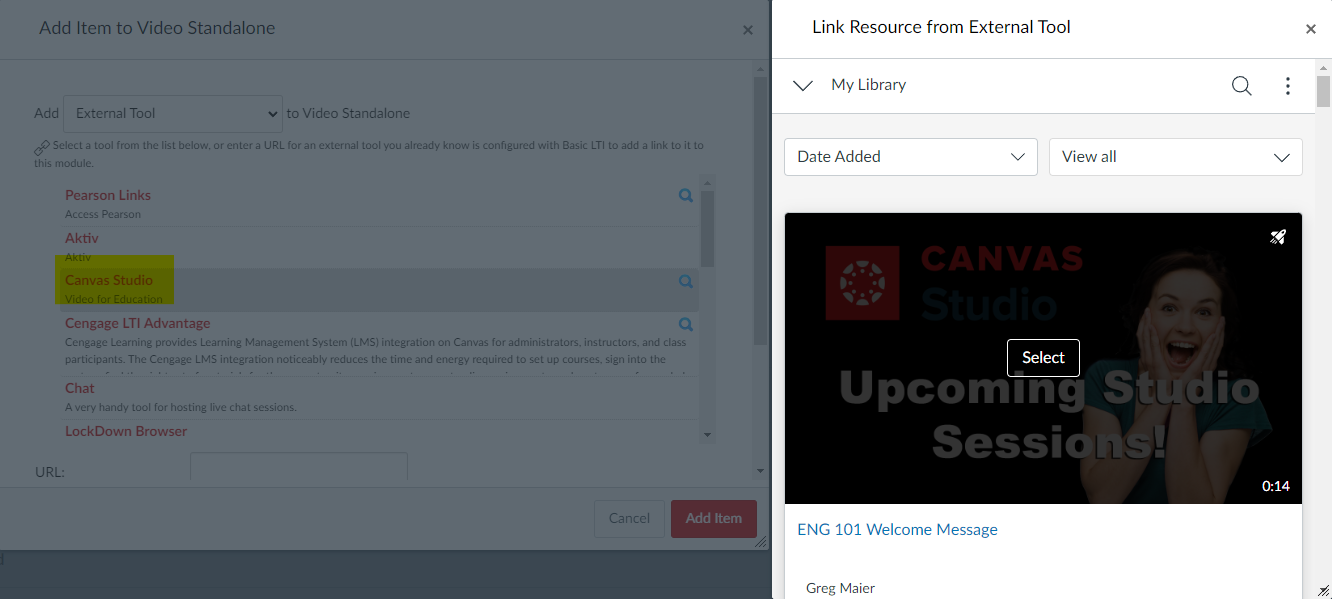
If you want to add a video from Canvas Studio directly to a module as a stand-alone item:
- Find or create the Module you’d like to add your video to.
- Click on the Add (+) button.
- Select External Tool from the pulldown menu.
- Click on Canvas Studio, then find and Select your video from the column of videos.
- Set your options as needed, then click Embed, then Add Item.
- Done. The title of the video should appear attached to that module.
Adding Closed Captions
 To add closed captioning to your videos:
- Hover your mouse over each video once they appear in your library
- Click to go to the hosting page.

- Choose the Captions tab under the video on each video’s page.
- Click the Request button
- Choose your language
- Click Request again.
You’ll get an email when the
 captions are complete.
To edit and enable your captions:
- Click back onto the Captions tab for each processed video.
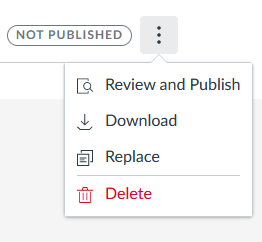
- Click the three vertical dots on the right.
- Choose Review and Publish.
This will bring you to the editor where you can fix any mistakes the speech-to-text engine has made.
Sharing Videos
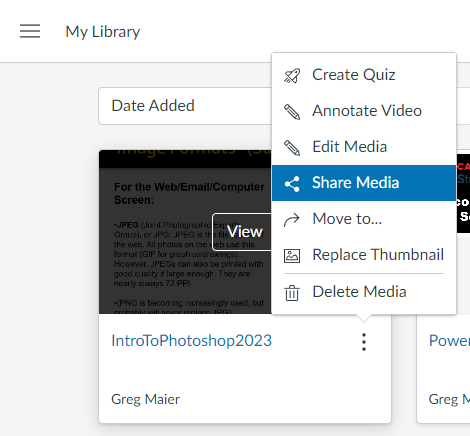 You can share your videos anywhere by clicking on the three dots on a video from inside your Studio library and clicking Share.
Add an email address if you want to share it with individuals (they will receive an email with a link) or click on the Links tab for more options. The first time you do this with a video, you will have to click the Create Public Link button.
The Link field can be copied to allow anyone access to the video if they have the URL. The Embed Code field can be copied to embed the video on the web where allowed (including as part of a quiz question in Canvas).
